
Hướng dẫn cài đặt OpenLitespeed 1.7, PHP 8, MariaDB 10 trên CentOS 7
 Bùi Tấn Việt - 2021-10-14 17:04:45 (GMT+7)
Giới thiệu
OpenLiteSpeed là web server mã nguồn mở dựa trên bản thương mại LiteSpeed. OpenLiteSpeed tích hợp tính năng caching phía server, tương thích với nhiều loại mã nguồn website phổ biến như WordPress. Nếu máy chủ chạy web server OpenLiteSpeed, bạn có thể sử dụng plugin LiteSpeed Cache cho website WordPress của mình. Giúp tối ưu và tăng tốc độ truy cập, giảm tài nguyên sử dụng của máy chủ.
OpenLiteSpeed tự động nhận file .htaccess giống như web server Apache. Vì vậy bạn không cần cấu hình rewrite rule thêm.
Mục đích
Cài đặt OpenLiteSpeed 1.7 bản mới nhất, PHP 8 mới nhất, MariaDB Server 10 mới nhất
Tương thích với WordPress, sử dụng được plugin LiteSpeed Cache. Chức năng cache phía server hoạt động tốt.
Phân quyền mỗi virtualhost chạy một user riêng để
chống tấn công local attack. User khác nhau không thể đọc được file của nhau.Tạo điều kiện để sử dụng vsftpd cho mỗi user sau này.
Yêu cầu thiết yếu
Để thực hiện hướng dẫn này, bạn cần các yêu cầu sau:
Máy chủ sử dụng CentOS 7
Quyền root
Bước 1: Cài đặt OpenLiteSpeed
Trước khi cài đặt, thực hiện update hệ thống
Khởi động lại máy chủ
Cài các gói và repository phụ thuộc
Cài đặt OpenLiteSpeed
Cho OpenLiteSpeed khởi động cùng hệ thống
Bước 2: Cài đặt PHP 8
Thực hiện cài đặt PHP 8 và các gói PHP mở rộng cần thiết.
PHP đã cài đặt, kiểm tra bằng lệnh: /usr/local/lsws/lsphp80/bin/php -v
Bước 3: Cài đặt MariaDB 10
Cài đặt MariaDB repository
Cài đặt MariaDB Server bản mới nhất
Khởi động MariaDB và cho MariaDB khởi động cùng hệ thống
Kiểm tra MariaDB bằng lệnh mysql
Mặc định, MariaDB không đặt mật khẩu cho user root, để bảo mật, bạn cần đặt mật khẩu root cho MariaDB bằng lệnh mariadb-secure-installation.
Bạn thực hiện enter để đồng ý cho đến khi dòng
New password:xuất hiện, lúc này bạn cần đặt mật khẩu cho user root của MariaDB. Thực hiện điền lại mật khẩu root tương tự tạiRe-enter new password:. Tiếp tục enter để đồng ý cho đến khi xuất hiện dòng thông báo thành côngThanks for using MariaDB!
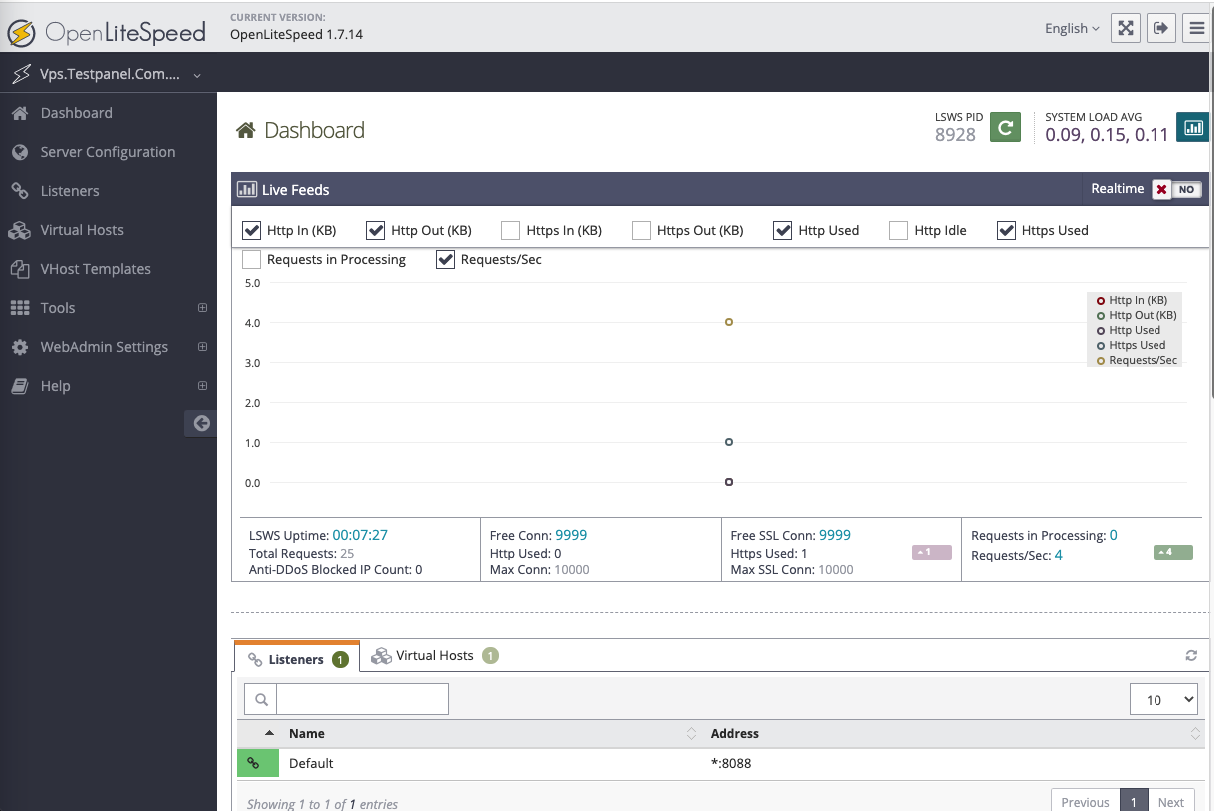
Bước 4: Đăng nhập vào OpenLiteSpeed Web Admin
Thực hiện đăng nhập với thông tin như sau:
URL:
https://IP:7080/Username và password được lưu tại:
/usr/local/lsws/adminpasswd
Thay IP bằng IP máy chủ của bạn. Bạn có thể dùng lệnh sau để xem username và password:
cat /usr/local/lsws/adminpasswd
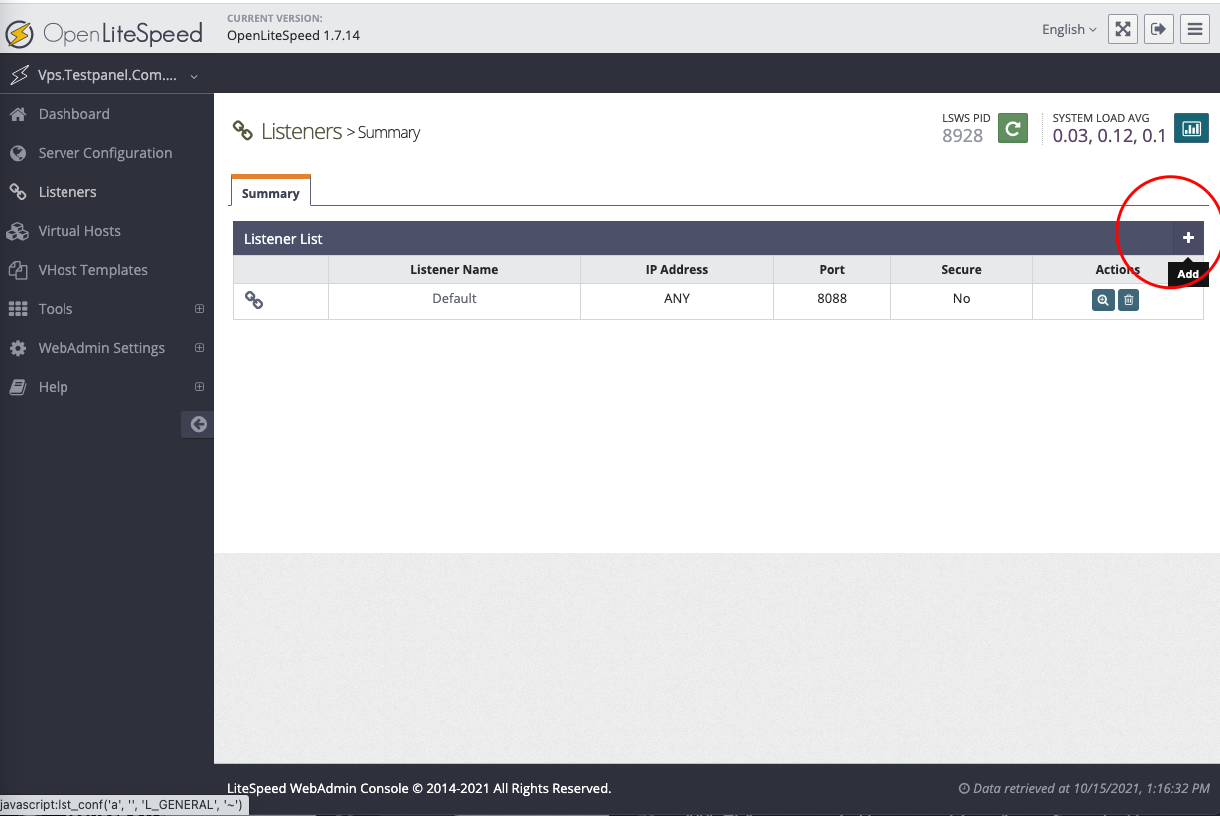
Bước 5: Tạo Listener
Mặc định OpenLiteSpeed sau khi cài đặt chỉ listen ở port 8088. Chúng ta tạo listener cho port 80 như sau: Vào Listener -> Add.
Điền các cấu hình như sau:
Listener name:
public port 80IP Address:
ANY IPv4Port:
80Binding:
Process 1Enable REUSEPORT:
YesSecure:
No
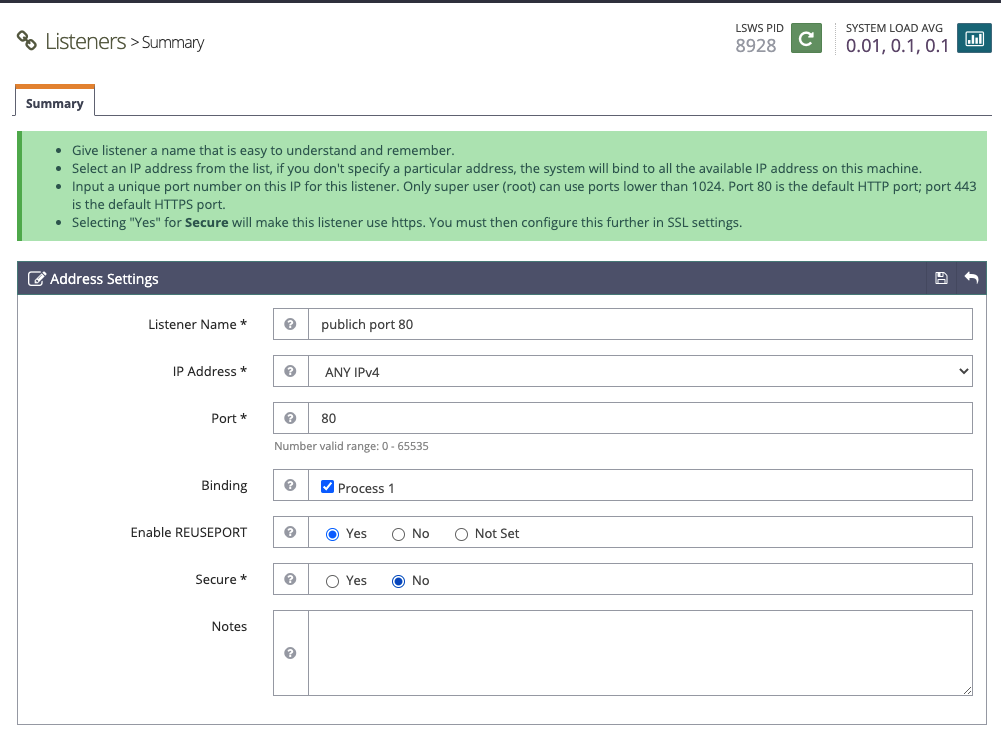
Chọn vào biểu tượng lưu bên phải để lưu.
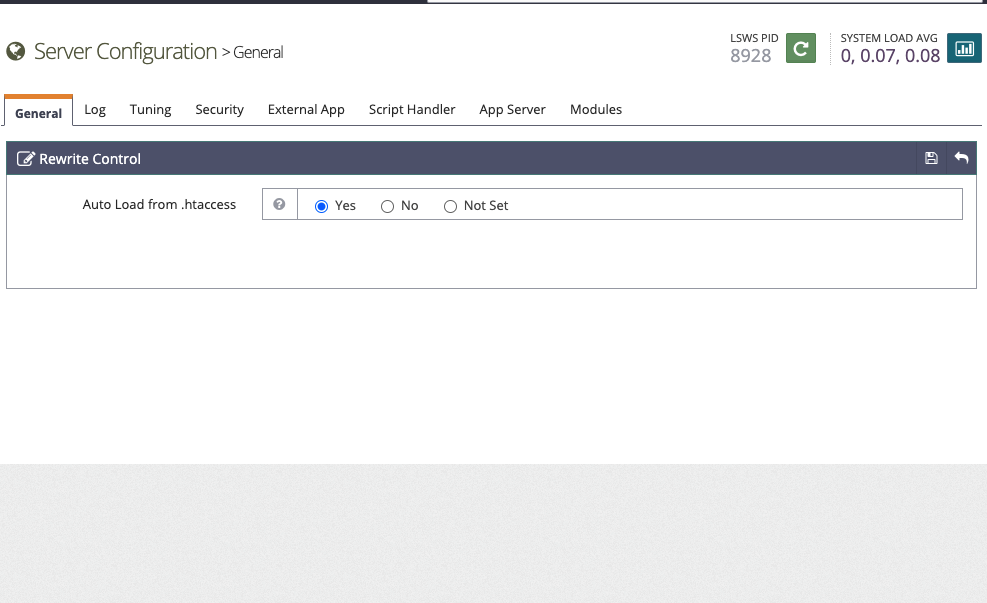
Cấu hình cho web server tự đọc file .htaccess bằng cách vào Server Configuration > General -> Rewrite Control -> chọn Edit, chọn Yes
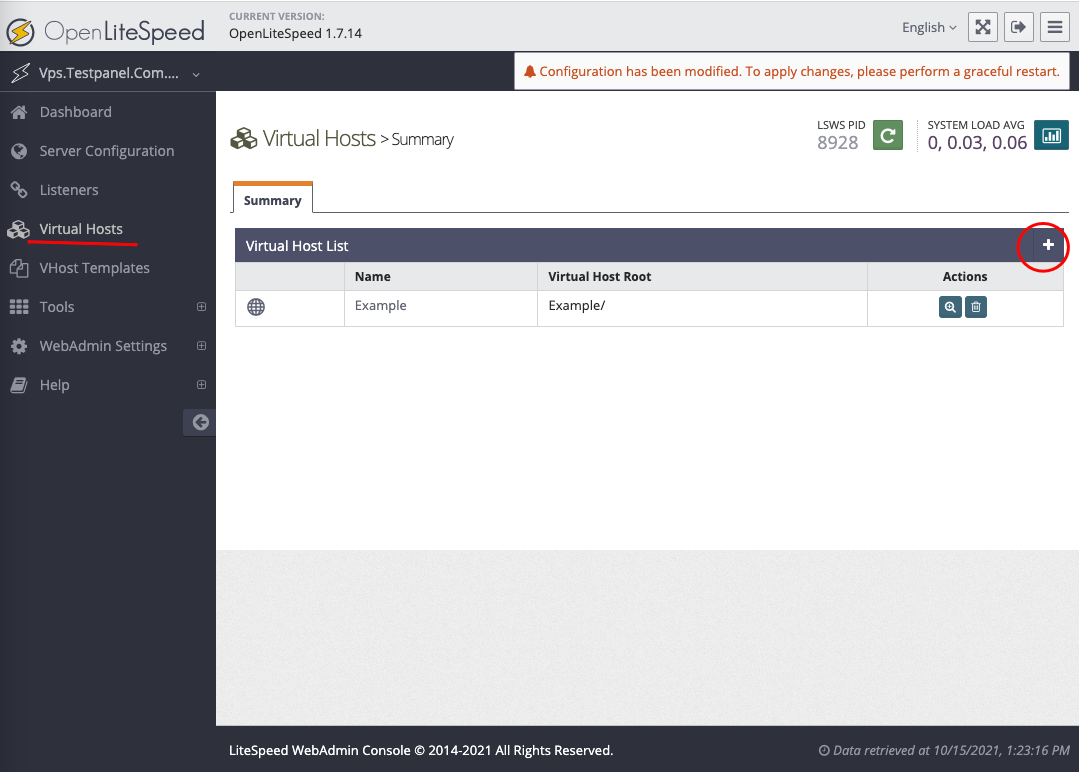
Bước 6: Tạo Virtualhost cho OpenLiteSpeed
Tạo Virtualhost với mục đích như sau:
Tên miền cho website là
testhost.comUser riêng cho virtualhost này tên là
testhostThư mục chứa website sẽ là
/home/testhost/public_html
Thực hiện tạo user hệ thống và thư mục chứa mã nguồn website bằng các lệnh sau:
Tạo virtualhost cho OpenLiteSpeed:
Vào phần Virtualhost -> chọn Add.
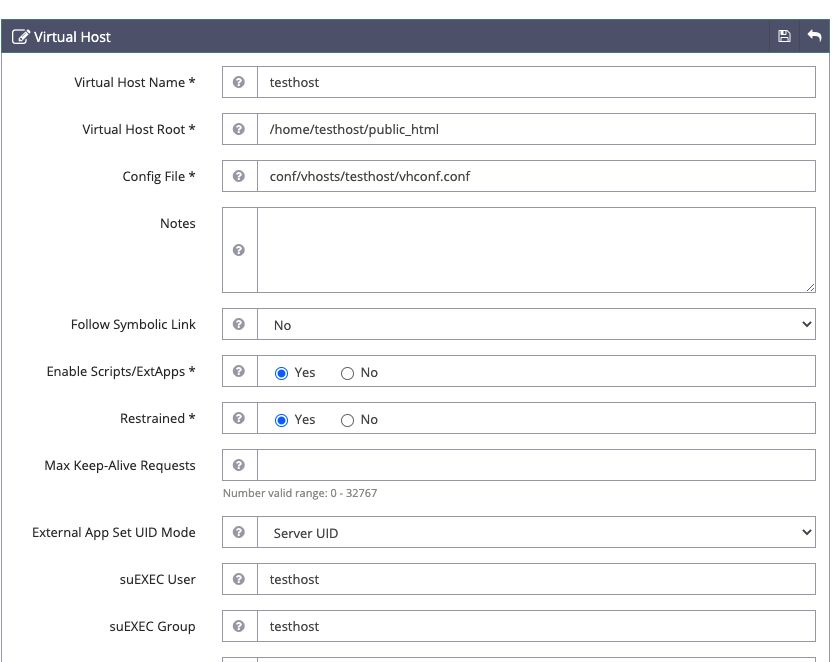
Điền thông tin như sau:
Virtual Host Name:
testhostVirtual Host Root:
/home/testhost/public_htmlConfig File:
conf/vhosts/testhost/vhconf.confFollow Symbolic Link:
NoEnable Scripts/ExtApps:
YesRestrained:
YesExternal App Set UID Mode:
Server UIDsuEXEC User:
testhostsuEXEC Group:
testhost
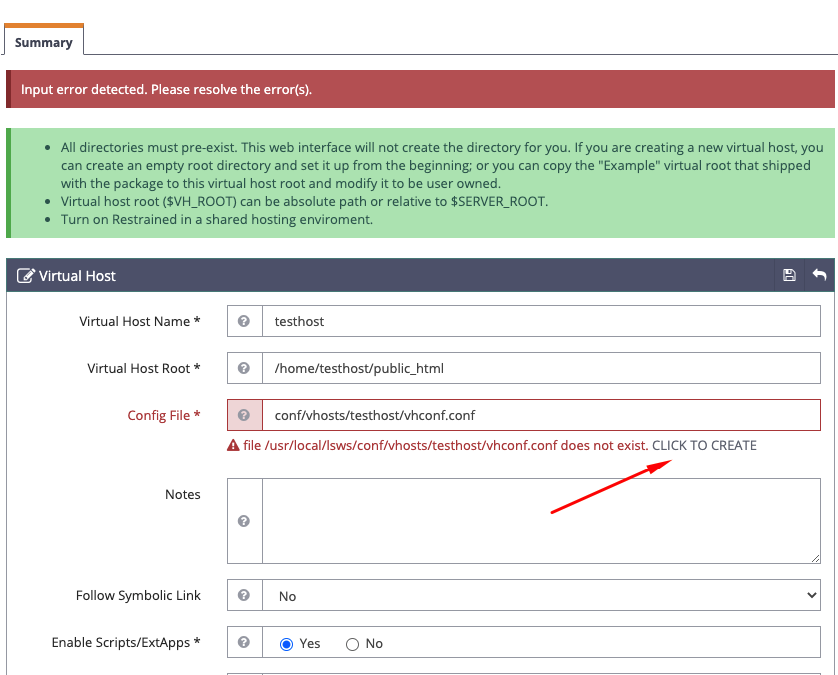
Chọn Save, sau đó bấm vào CLICK TO CREATE để hệ thống tạo mới file virtualhost, sau đó bấm Save để lưu.
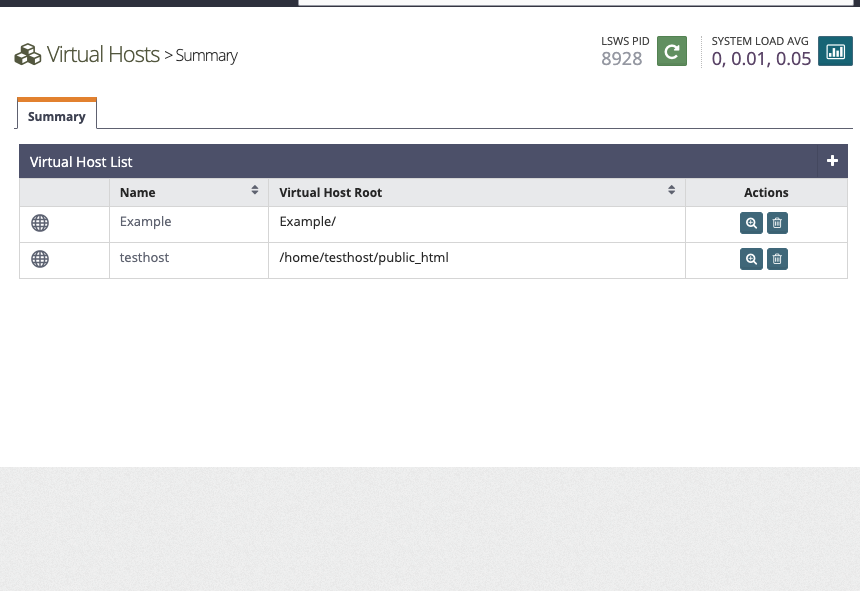
Tiếp tục vào Virtual Host -> testhost > General, chọn Edit tại mục General.
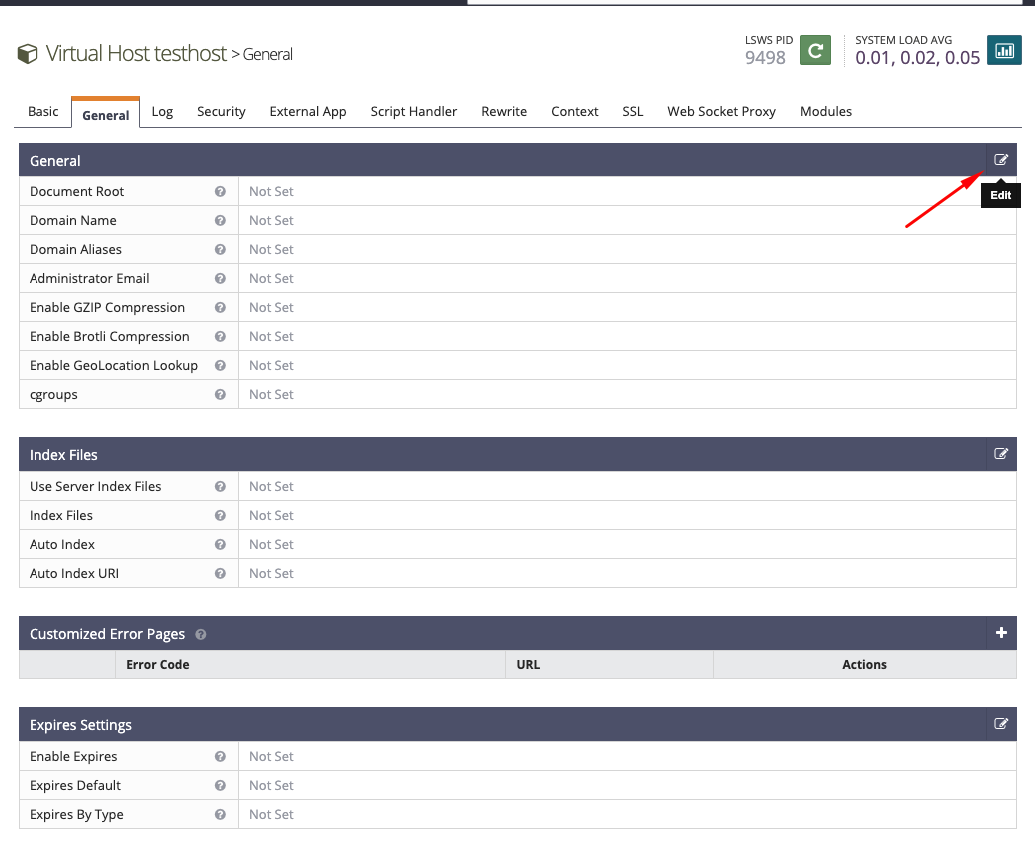
Điền thông tin
Document Root :
/home/testhost/public_htmlDomain Name:
testhost.comEnable GZIP Compression:
Yes
Tại mục Index Files chọn Edit. Điền các thông tin sau:
Use Server Index Files:
NoIndex Files:
index.php,index.htmlAuto Index:
Yes

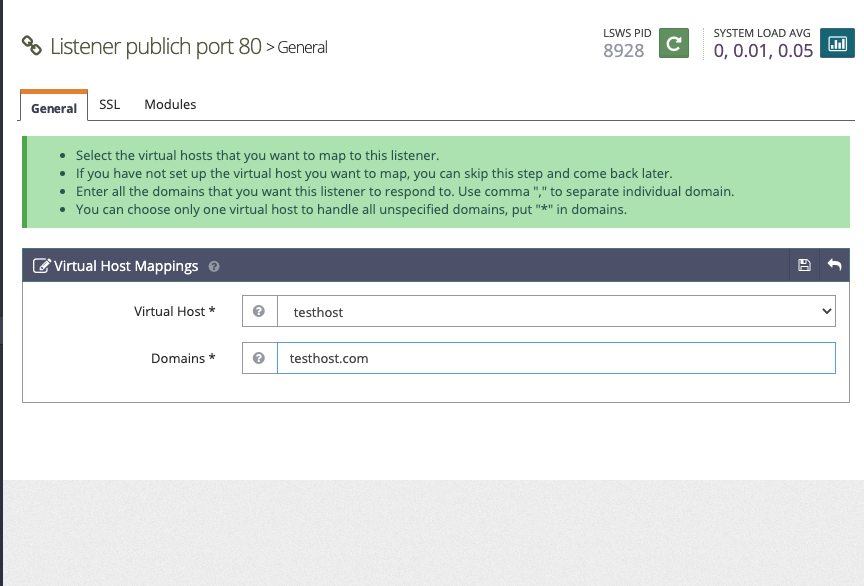
Bước 7: Map Listener vào Virtualhost
Vào Listener, chọn public port 80, Tại Virtual Host Mappings chọn Add.
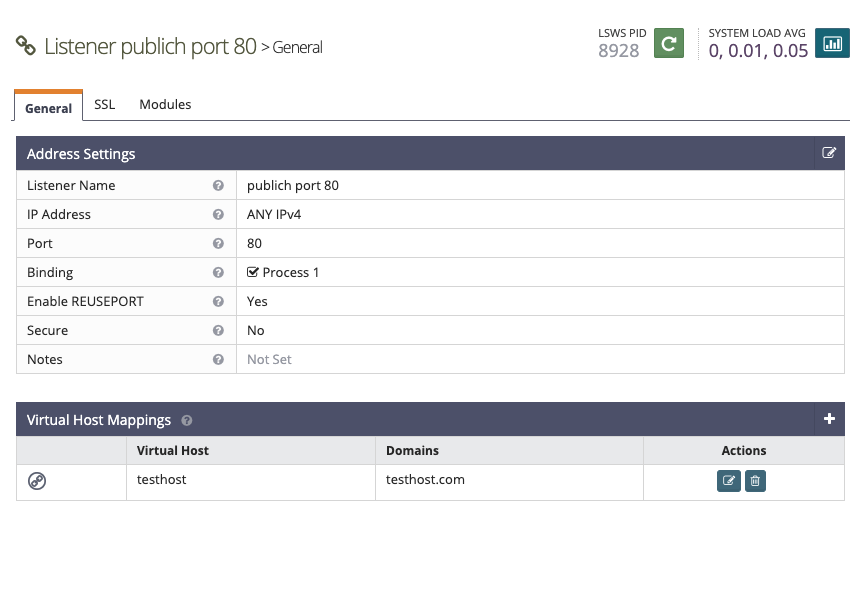
Virtual Host: Chọn
testhostDomains: Điền
testhost.com
Bấm Save để lưu.
Bước 8: Đổi phiên bản PHP sang lsphp80
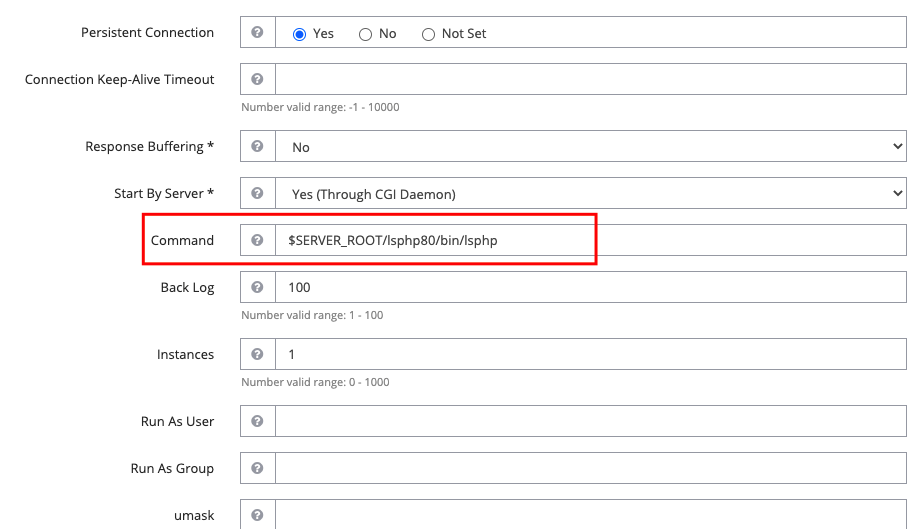
- Vào Server Configuration > External App, chọn Edit tại LiteSpeed SAPI App
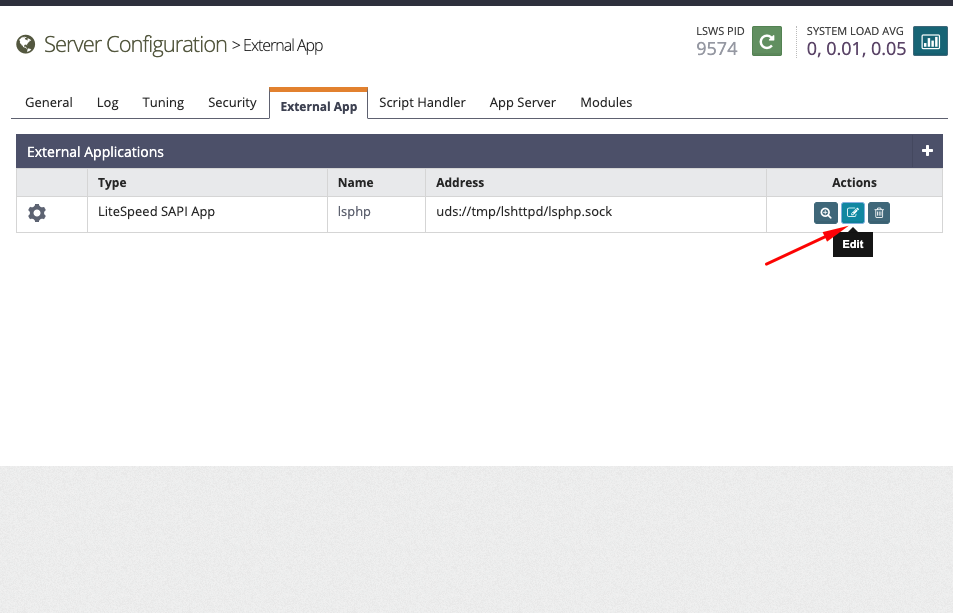
- Tại Command, đổi từ
lsphp73thànhlsphp80. Cụ thể dòng này là:$SERVER_ROOT/lsphp73/bin/lsphp, sau đó chọn Save để lưu.
Restart lsws để cập nhật các thay đổi cấu hình
Chạy lệnh sau để hệ thống kill tất cả các tiến trình lsphp, giúp nhanh chóng cập nhật thay đổi:
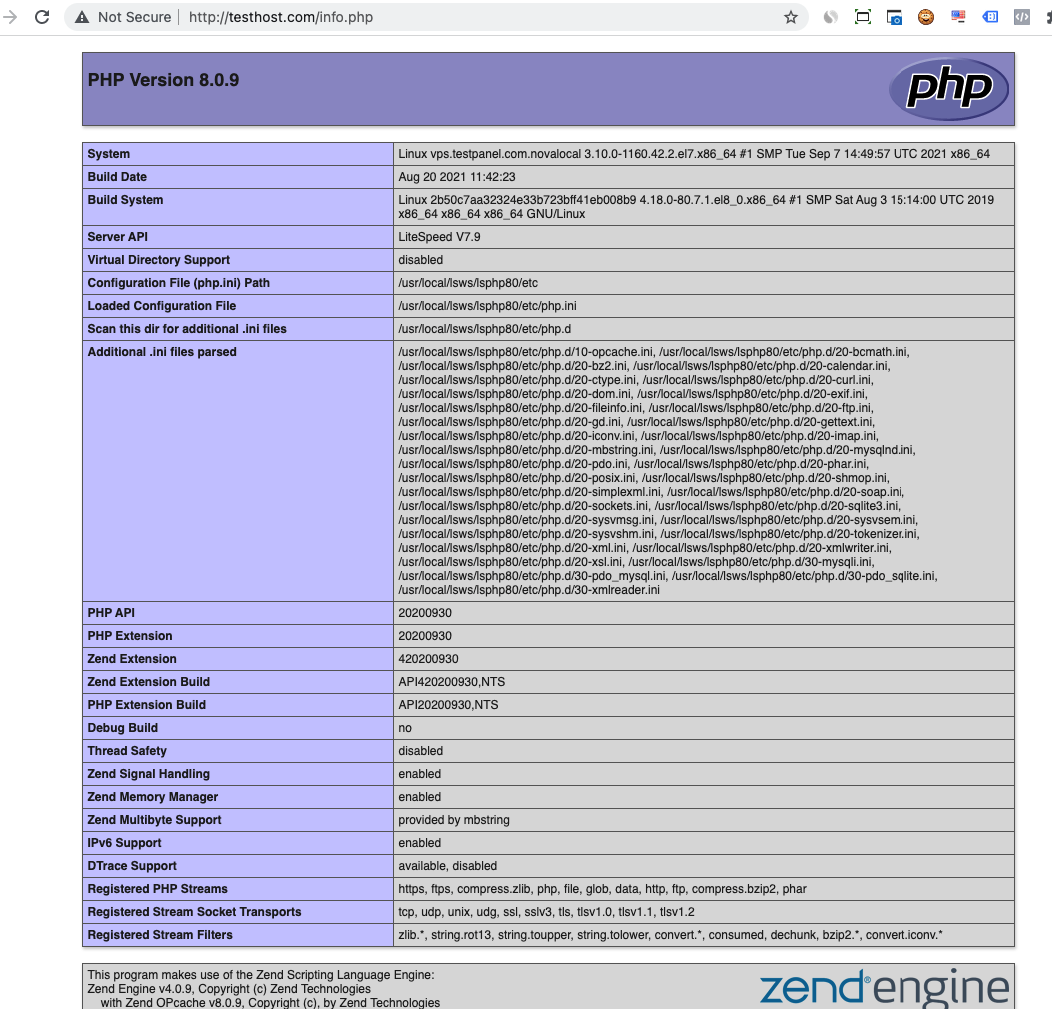
Tạo file /home/testhost/public_html/info.php với nội dung như sau để kiểm tra kết quả
Trỏ tên miền về IP của máy chủ, nếu tên miền chưa đăng ký, bạn có thể sử dụng phương pháp trỏ file hosts trên máy tính để kiểm tra. Sau đó truy cập cập vào http://testhost.com/info.php sẽ thấy kết quả web server với PHP 8 đã hoạt động.
Tổng kết
Hướng dẫn trên đã giúp bạn hoàn tất các bước cài đặt OpenLiteSpeed, PHP 8, MariaDB, đồng thời tạo virtualhost cho hosting testhost.com hoạt động. Các phần mềm trên đều được cài đặt bản mới nhất, giúp tương thích với WordPress và đạt hiệu năng tốt nhất.
Tiếp theo, bạn có thể tham khảo Hướng dẫn cài đặt WordPress trên web server OpenLitespeed.


Tính năng đang được phát triển