Chào các bạn, trong bài viết ngày hôm nay, mình sẽ hướng dẫn các bạn cài đặt và sử dụng Socks5 Proxy Shadowsocks.
Contents
Giới thiệu
SOCKS là một protocol hoạt động ở layer 5 Session Layer, cho phép chúng ta forward các gói tin TCP/UDP thông qua một Proxy Server, mục đích là để bypass Firewall tại hệ thống network của công ty, truy cập các website bị chặn bởi chính phủ, …v.v
SOCKS5 là phiên bản mới nhất của SOCKS protocol có hỗ trợ thêm tính năng xác thực, hỗ trợ IPv6 và UDP packet.
Shadowsocks là một trong những Socks Proxy phổ biến,ban đầu được xây dựng để giúp cho người dân Trung Quốc bypass The Great Firewall.
Cài đặt Shadowsocks trên CentOS 7
Các bạn thực hiện cài đặt các Tool và Library cần thiết cho Shadowsocks
yum update && yum upgrade -y
yum install epel-release -y
yum install -y gcc gettext autoconf libtool automake make pcre-devel asciidoc xmlto udns-devel \
libev-devel libsodium-devel mbedtls-devel git m2crypto c-ares-devel
Các bạn download Shadowsocks từ Github
cd /opt
git clone https://github.com/shadowsocks/shadowsocks-libev.git
cd shadowsocks-libev
git submodule update --init --recursive
Thực hiện cài đặt sử dụng lệnh sau
./autogen.sh
./configure
make && make install
Sau khi cài đặt xong, các bạn tạo User cho Shadowsocks
adduser --system --no-create-home --group shadowsocks
Tạo thư mục chứa config files cho Shadowsocks
mkdir -m 755 /etc/shadowsocks
Sau đó các bạn tạo file /etc/shadowsocks/shadowsocks.json và copy vào nội dung sau
{
    "server":"192.168.1.100",
    "server_port":8388,
    "password":"your_password",
    "timeout":300,
    "method":"aes-256-gcm",
    "fast_open": true
}
Thay server = IP của máy chủ và đổi password của bạn nhé.
Tối ưu hệ thống để Shadowsocks hoạt động nhanh và delay thấp nhất, các bạn tạo file cấu hình /etc/sysctl.d/local.conf và thêm vào nội dung như sau:
# max open files
fs.file-max = 51200
# max read buffer
net.core.rmem_max = 67108864
# max write buffer
net.core.wmem_max = 67108864
# default read buffer
net.core.rmem_default = 65536
# default write buffer
net.core.wmem_default = 65536
# max processor input queue
net.core.netdev_max_backlog = 4096
# max backlog
net.core.somaxconn = 4096
# resist SYN flood attacks
net.ipv4.tcp_syncookies = 1
# reuse timewait sockets when safe
net.ipv4.tcp_tw_reuse = 1
# turn off fast timewait sockets recycling
net.ipv4.tcp_tw_recycle = 0
# short FIN timeout
net.ipv4.tcp_fin_timeout = 30
# short keepalive time
net.ipv4.tcp_keepalive_time = 1200
# outbound port range
net.ipv4.ip_local_port_range = 10000 65000
# max SYN backlog
net.ipv4.tcp_max_syn_backlog = 4096
# max timewait sockets held by system simultaneously
net.ipv4.tcp_max_tw_buckets = 5000
# turn on TCP Fast Open on both client and server side
net.ipv4.tcp_fastopen = 3
# TCP receive buffer
net.ipv4.tcp_rmem = 4096 87380 67108864
# TCP write buffer
net.ipv4.tcp_wmem = 4096 65536 67108864
# turn on path MTU discovery
net.ipv4.tcp_mtu_probing = 1
# for high-latency network
net.ipv4.tcp_congestion_control = hybla
# for low-latency network, use cubic instead
net.ipv4.tcp_congestion_control = cubic
Dùng lệnh sau để các cấu hình trên có hiệu lực
sysctl --system
Tiếp theo các bạn tạo file service systemd cho Shadowsocks, tạo file /etc/systemd/system/shadowsocks.service và copy vào nội dung sau:
[Unit]
Description=Shadowsocks proxy server

[Service]
User=root
Group=root
Type=simple
ExecStart=/usr/local/bin/ss-server -c /etc/shadowsocks/shadowsocks.json -a shadowsocks -v start
ExecStop=/usr/local/bin/ss-server -c /etc/shadowsocks/shadowsocks.json -a shadowsocks -v stop

[Install]
WantedBy=multi-user.target
Các bạn lưu file lại và thực hiện reload cấu hình systemd, đồng thời start dịch vụ Shadowsocks
systemctl daemon-reload
systemctl enable shadowsocks
systemctl start shadowsocks
Nếu máy chủ của bạn có cài đặt FirewallD hoặc iptables, các bạn có thể dùng 2 lệnh sau để mở port cho ứng dụng cho máy chủ
IPTABLES
iptables -4 -A INPUT -p tcp --dport 8388 -m comment --comment "Shadowsocks server listen port" -j ACCEPT
FIREWALLD
firewall-cmd --permanent --zone=public --add-rich-rule='rule family="ipv4" port protocol="tcp" port="8388" accept'
firewall-cmd --reload
Cài đặt và cấu hình Shadowsocks Client
Linux Client
Các bạn download file AppImage ứng dụng Outline và khởi chạy ứng dụng này (nếu ở bước sau ứng dụng kết nối không hiển thị popup nhập password để thực hiện escalate permission, các bạn tắt và chạy lại ứng dụng với quyền sudo)
Để đăng nhập server qua phần mềm Outline, các bạn thay đổi thông tin mà các bạn đã cấu hình ở file /etc/shadowsocks/shadowsocks.json trên Server
echo "ss://"`echo -n "encrypt_method:password@server_ip:server_port"|base64`
Ví dụ như:
echo "ss://"`echo -n "aes-256-gcm:[email protected]:8388"|base64`
Chúng ta sẽ nhận được 1 chuỗi kết nối định dạng như sau:
ss://YWVzLTI1Ni1nY206eW91cl9wYXNzd29yZEAxOTIuMTY4LjEuMTAwOjgzODg=
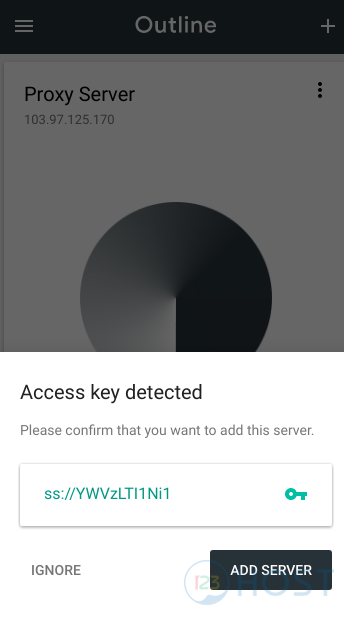
Các bạn nhập chuỗi này vào Outline và nhấn kết nối
Tips:// Các bạn có thể đặt tên cho config này bằng cách thêm vào đằng sau chuỗi BASE64 vừa tạo chuỗi #name, ví dụ như:
ss://YWVzLTI1Ni1nY206eW91cl9wYXNzd29yZEAxOTIuMTY4LjEuMTAwOjgzODg=#my_shadow_server
Windows Client
Các bạn download file client cho Windows từ trang https://shadowsocks.org/en/download/clients.html
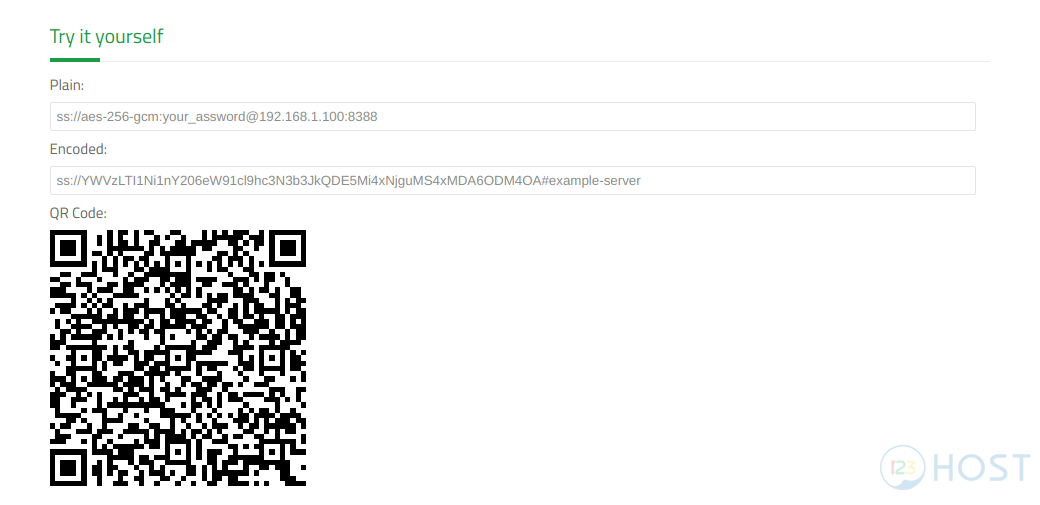
Sau khi cài đặt, các bạn có thể tạo URI truy cập tại trang web download ở trên
Sau đó, các bạn nhập chuỗi URI đã được encode BASE64 vào client là có thể bắt đầu kết nối


Leave A Comment?